Первое включение/en — различия между версиями
(Новая страница: «'' 'Wireless connection over Wi-Fi' ''») |
(Новая страница: «By default, the WebHmi wireless interface is configured in an access point mode with DHCP enabled and disabled security. Thus, your laptop or tablet can simply be…») |
||
| Строка 26: | Строка 26: | ||
'' 'Wireless connection over Wi-Fi' '' | '' 'Wireless connection over Wi-Fi' '' | ||
| − | + | By default, the WebHmi wireless interface is configured in an access point mode with DHCP enabled and disabled security. Thus, your laptop or tablet can simply be connected to the '' WebHmi '' network (the settings will be made automatically), then go to the site with the address: '' '192.168.1.1' '' | |
[[Файл:link_000.png|600px]]<br> | [[Файл:link_000.png|600px]]<br> | ||
Версия 13:07, 20 ноября 2017
Preparation for work
Before you can start WebHMI for the first time, you need to take some preparatory steps.
1. Insert an SD card. A memory card is not included in WebHMI shipment package and its selection we leave for users. Recommended size - from 512 MB. SLC type cards much more reliable.
2. By default, the WebHMI IP address of the LAN interface is 192.168.1.1. If you plan to connect to a local network, you need to make sure that there are no devices with the address 192.168.1.1 in this network, otherwise there will be a conflict of addresses. The same applies when several WebHMI devices with factory settings are connected to the local network. All devices will have the same IP address and the network will not work correctly.
3. When connecting the RS485 bus, make sure that not only lines A and B are connected but also their common wire that equalizes the potentials between the WebHMI and other devices on the bus. This is especially true if the line is long or the devices are powered by different power sources.
4. If you do not have WiFi on your computer, you must connect the WebHMI to your computer or network using an Ethernet cable through the LAN interface. Only this interface allows incoming connections. Note that WebHMI on this interface has a DHCP server enabled by default. There may be conflicts with other DHCP servers on the local network.
After completing these steps, you can power-up WebHMI.
During the boot process, the system will check the SD card and automatically format it if necessary.
If the SD card is not detected, the WebHMI will flash three Error, WWW, and VPN LEDs. After 20 flashes, the system boots but not all services are started. During the next minute, watchhog will see that there is no SD card and will reboot the system. In this way, the system will constantly reboot until an SD card is inserted.
Access to the web interface
Work with WebHmi takes place over the network. All settings, including project configuration, are done in the browser. All you need to get started - connect to the device and go in the web interface.
'Wireless connection over Wi-Fi'
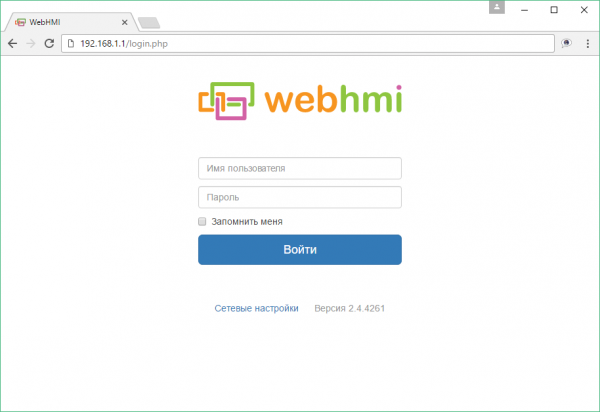
By default, the WebHmi wireless interface is configured in an access point mode with DHCP enabled and disabled security. Thus, your laptop or tablet can simply be connected to the WebHmi network (the settings will be made automatically), then go to the site with the address: '192.168.1.1'
Проводное подключение
WebHmi имеет 2 порта Ethernet: LAN сконфигурированный как DHCP сервер и WAN настроенный как DHCP клиент, для которого по умолчанию в фаерволе запрещены входящие соединения. Таким образом, доступ к веб-интерфейсу системы можно получить только из LAN.
Дальнейшие действия могут отличатся в зависимости от ОС (пример с Windows 7)
1. Подключить кабель Ethernet к порту LAN
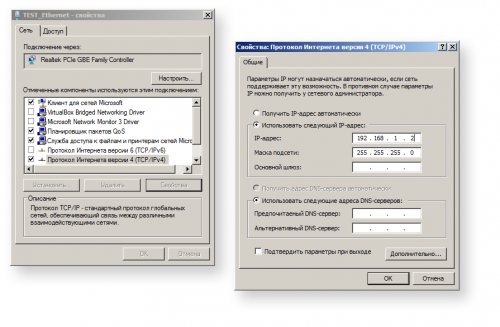
2. Настроить в ПК свойства сетевого подключения - IP адрес [192.168.1.2] и маску подсети [255.255.255.0] или выбрать «Получить IP адрес автоматически» (Пуск / Панель управления / Центр управления сетями и общим доступом / Изменение параметров адаптеров / Свойства подключения / Протокол интернета версия 4 / Свойства). Ok.
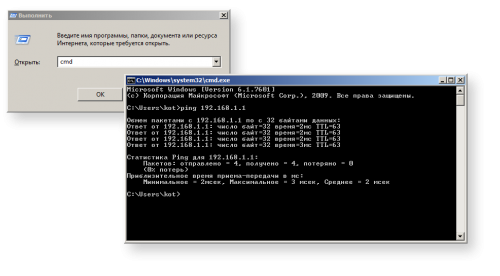
3. Проверить связь. Вызвать окно «Выполнить» нажав сочетание клавиш Win+R и запустить от туда интерпретатор командной строки “CMD”. В открывшемся окне “CMD” выполнить команду ping 192.168.1.1 Если пойдет обмен пакетами - то связь есть.
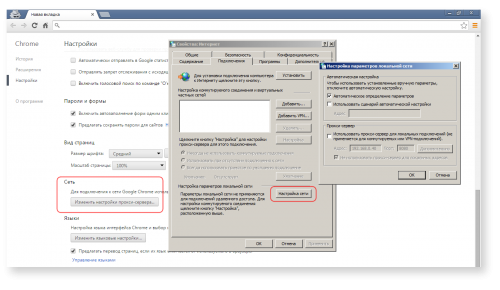
Если, связь есть, но по каким-то причинам не удается зайти на сайт – проверьте, не используется ли proxy server в настройках браузера.
СОВЕТ. Для корректной работы веб-интерфейса системы, используйте браузер CHROME последней версии.
Вход в веб-интерфейс
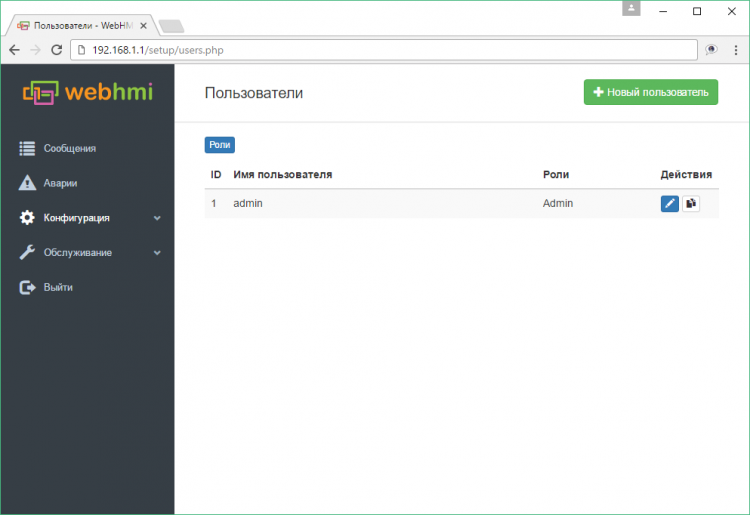
Для входа на новое устройство необходимо ввести пароль и логин - admin. После входа по умолчанию будет осуществлен переход на страницу конфигурации пользователей (п. меню Конфигурация / Пользователи). В дальнейшем настройка всего проекта происходит через боковое подменю "Конфигурация".
