Connecting WebHMI to Level2
To connect WebHMI to the Level2 system you will need an account in this system. Register in Level2 on the page Registration. Use your e-mail as login name. During registration you will receive a letter with a special link to confirm registration. After clicking on this link, you can start working with Level2.
After entering Level2, you will be taken to the page with the list of nodes. The
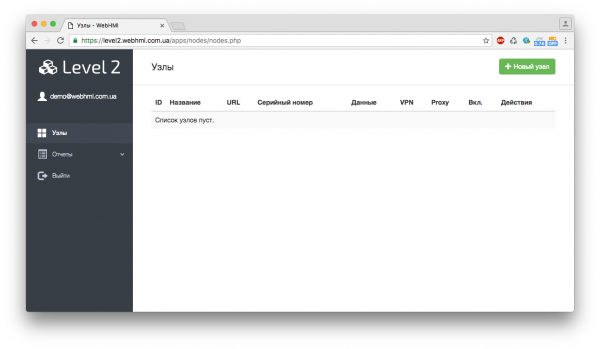
A node is one WebHMI device. You can connect an unlimited number of nodes to your account.
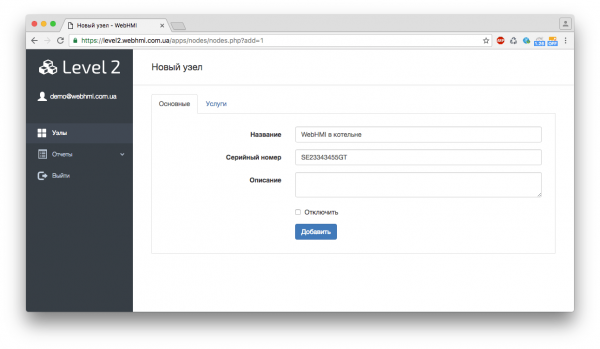
To connect a new node, click on the "New node" button. In the form that appears, enter a name for your site and its serial number.
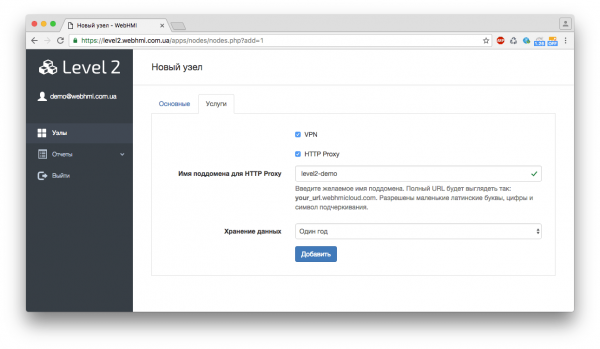
If you want to use additional services, such as VPN and HTTP Proxy, you can enable them on the Services tab. These services are paid, for their work it is necessary to have enough money on the account balance.
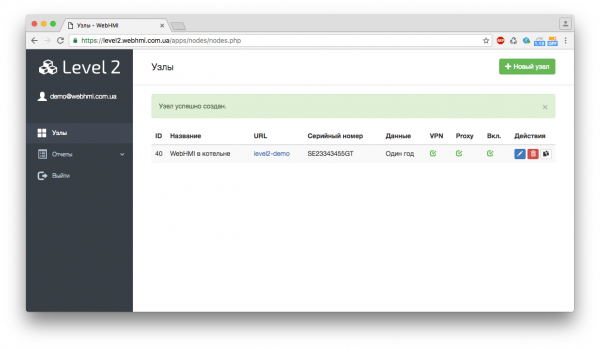
After clicking on the "Add" button, your node will be created in the system with selected additional services and debiting funds from your balance. If there are not enough funds on the balance sheet, the services will not be activated.
After the node is created, you can open its properties and in the "Information" tab see the API key for access to Level2 and, if the VPN service is enabled, the login and password for connecting to the VPN.
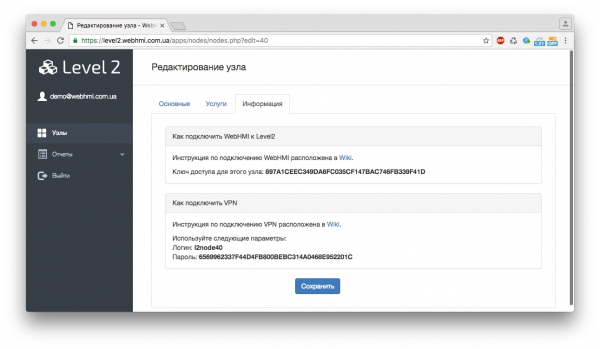
The API key is the identifier for your site. Do not share it with anyone. You must enter it in WebHMI on the 'Configuration-> System Settings' page. Select "Level2" as the server
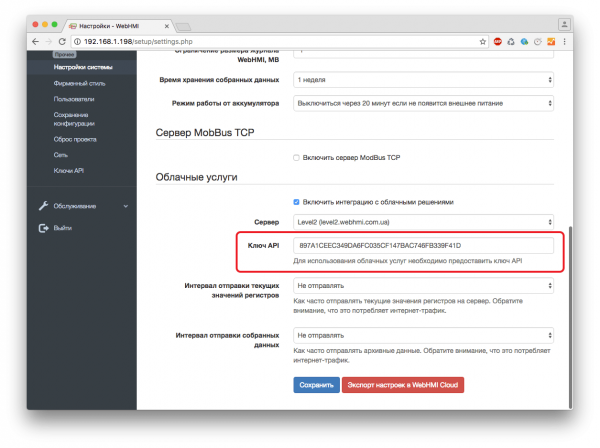
If you do not plan to send the collected data to the Level2 server, select "Do not send" in the "Send current values of registers" and "Send interval of collected data" items. The more frequent the sending of data, the greater the consumption of Internet traffic (actual for 3G connections).
Click "Save".
After that, your WebHMI will be able to send SMS messages to Telegram. Sending SMS - the service is paid, works with a prepayment.
For registers that have the "Send log to WebHMI Cloud" option, the accumulated log will be sent to the Level2 server. For registers that have the option "Send the current value to the WebHMI Cloud", the current values will be sent to the Level2 server. The frequency of sending these values can be configured on the page 'Configuration-> System settings' .
Обратите внимание, что после восстановления проекта из бекапа, система автоматически снимает галочку "Включить интеграцию с облачными решениями". Ее необходимо включать вручную. Это сделано для того, что бы предотвратить случайную отправку данных с WebHMI, на который вы восстановили проект в целях отладки или разработки.
После включения галочки "Включить интеграцию с облачными решениями" и ввода корректного ключа, система начнет в фоновом режиме экспортировать свои настройки в Level2. При большом проекте это может занять некоторое время. Поэтому возможны ситуации, когда данные в Level2 отображаются не сразу. Подождите несколько минут после первого включения этой опции.
В дальнейшем, при любом изменении проекта, система сама будет обновлять свои параметры в Level2.