События/en — различия между версиями
(Новая страница: «As an example of the event report, let's consider the task of determining the time interval when a certain parameter took a given value (1), recording additional…») |
(Новая страница: «If you select the option '''Add registers to the report (Save to log)''' , it will be possible to set the condition registers in the form of Ey.x. (For a complete…») |
||
| Строка 19: | Строка 19: | ||
[[Файл:Action .png|750px]]<br><br> | [[Файл:Action .png|750px]]<br><br> | ||
| − | + | If you select the option '''Add registers to the report (Save to log)''' , it will be possible to set the condition registers in the form of Ey.x. (For a complete description, see [[Internal_registers_WebHMI | here]]). The condition registers are numbered from 0 and further in ascending order (x is an index), y is the event identifier that is assigned to it when it is created and is displayed in the event list. As a parameter of the condition register one of the 4 options are possible: | |
| − | *Start time - | + | *Start time - event start time |
| − | *End time - | + | *End time - event end time |
| − | *Last update time - | + | *Last update time - the time of last record in the event |
| − | * | + | *Any register from Registers list - and the third column of the report setting allows to select processing for the register - take minimal (Min), maximal value(Max), first value at the moment of event start (First Value) or the last upon the event end(Last Value), average value during the event time (Average Value). |
| − | <p> | + | <p> |
| − | + | The settings for the event condition registers in our example are provided on previous picture. The names of the columns can be changed. For the E2.0, E2.1 registers with time value, the time format pattern is used like in PHP. For the E2.2, E2.3 registers the max. and min. values respectively. E2.4 - average value during the event. </p> | |
| − | + | ||
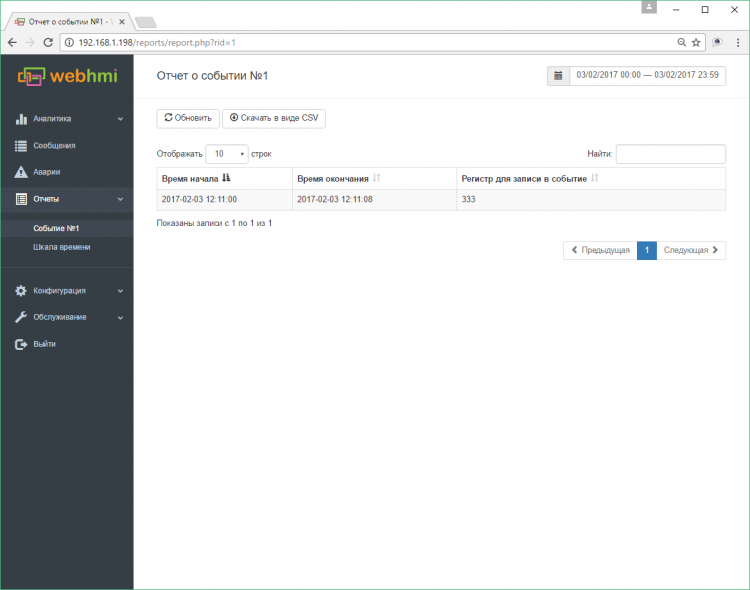
| + | After the example event setup, the followed report would be seen in the Reports menu:<br><br> | ||
[[Файл:Event report example copy.png|750px]]<br><br> | [[Файл:Event report example copy.png|750px]]<br><br> | ||
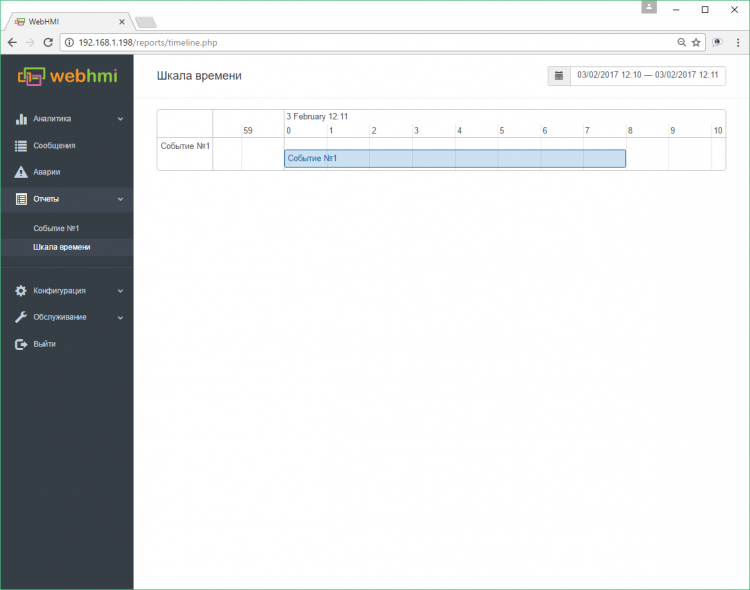
| − | <p> | + | <p> Since the "Show on timeline" option was set when creating the event, it will also be shown on the timeline. The line with a point on the axis mark event start time or the one-moment event. You can navigate the timeline holding main mouse button to move horizontaly and zooming with mouse wheel button. <br><br> |
[[Файл:Time line.png|750px]] | [[Файл:Time line.png|750px]] | ||
Версия 14:51, 9 октября 2017
Events are a mechanism that allows you to record data only upon specified conditions are met: a certain technological operation has started, or for example, a process parameter has exceeded the allowed limits - and it is necessary to obtain a separate set of data related to this moment, such as the start, end, values or changes of other parameters (affecting the process or dependent on it) at this time, or during this process state, making so possible to effectively analyze such situations.
Thus, the events allow you to conveniently filter out the necessary data for each of these conditions for their occurrence, and obtain separate structured reports for each event separately. Unlike building the necessary protocols by 'mining' information in the database (logs), event reports are generated 'on the fly' ie. at a pace with the monitoring process. After the event is created, its data becomes available as reports in the Configuration - Reports menu, and it is also possible to present data on the timeline ('tape') available in the Reports - Timeline ( Reports / Timeline) (after selecting the Show on timeline option for one of the events).
As an example of the event report, let's consider the task of determining the time interval when a certain parameter took a given value (1), recording additional data associated with this event - start and end time of this interval, the last value of a certain parameter. As the signal source, we will use register data D0 (bit).
To create events, select the menu item Configuration / Events , then Add new event. The basic settings are shown in the figure. Because the event is continuing, you must remember to specify the appropriate option.
A parent event checkbox means that this event will only be registered if the parent event occurs.
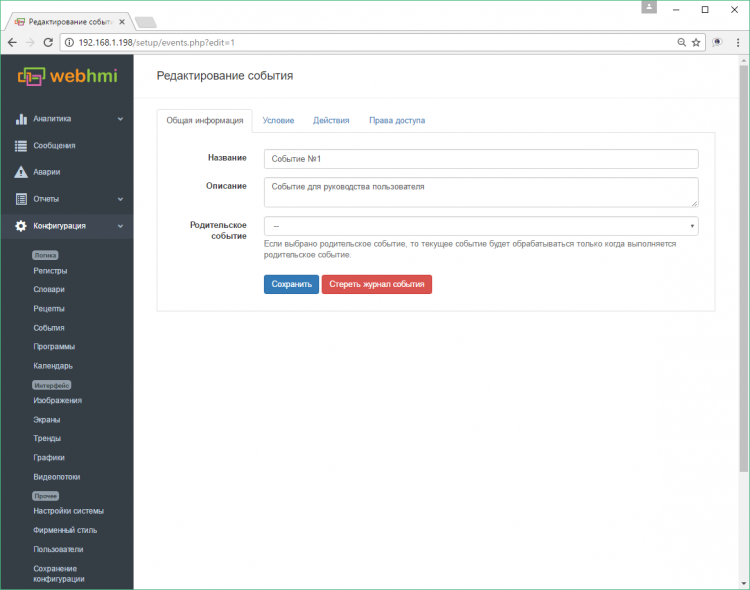
The Condition tab serves for defining event trigger condition:
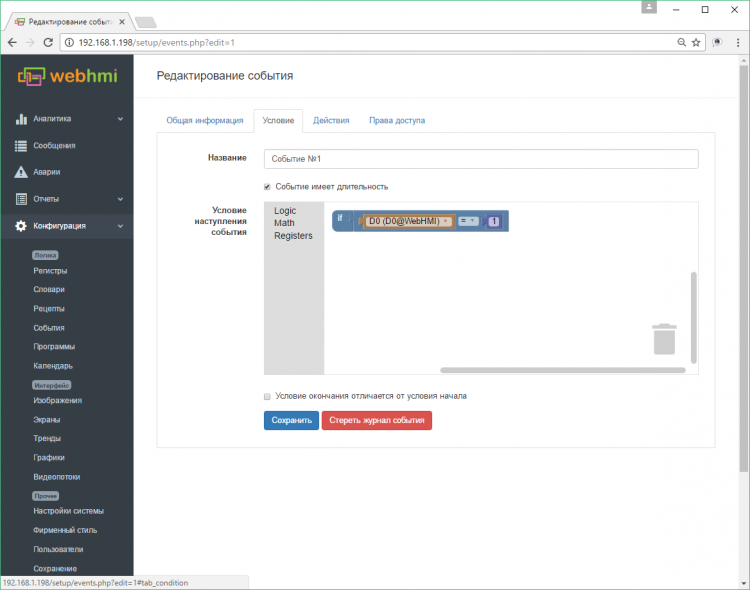
The visual editor allows you to 'glue' the logical expressions in a chain of conditions, with several levels of nesting if required. The following blocks are available
- Logic -logic operators "NOT", "AND", "OR", and comparison - "equal", "not equal", "greater than", "less than", "greater or equal", "less or equal";
- Math - arithmetic blocks - a constant, or an operation of addition, subtraction, multiplication, division;
- Registers - selection block to include a register in logical or arithmetic expressions;
The 'Action ' tab of the event settings determines what, how, and when have to be recorded in the event report data structure.
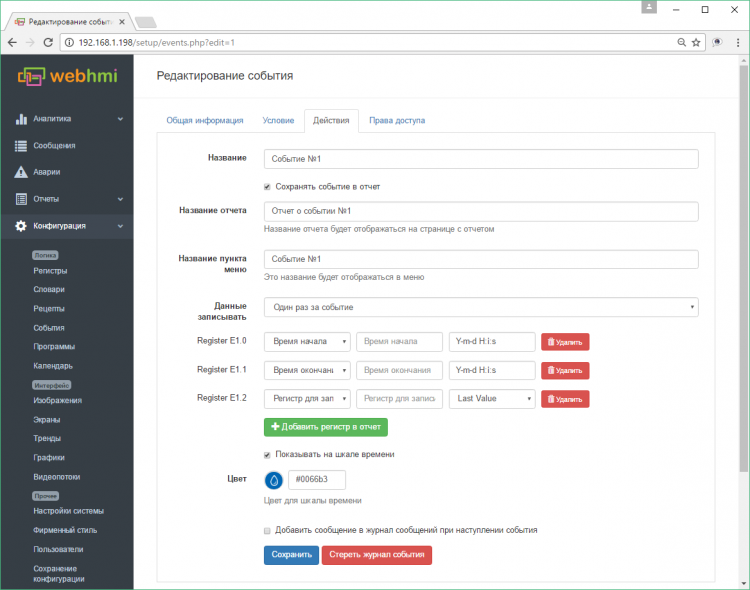
If you select the option Add registers to the report (Save to log) , it will be possible to set the condition registers in the form of Ey.x. (For a complete description, see here). The condition registers are numbered from 0 and further in ascending order (x is an index), y is the event identifier that is assigned to it when it is created and is displayed in the event list. As a parameter of the condition register one of the 4 options are possible:
- Start time - event start time
- End time - event end time
- Last update time - the time of last record in the event
- Any register from Registers list - and the third column of the report setting allows to select processing for the register - take minimal (Min), maximal value(Max), first value at the moment of event start (First Value) or the last upon the event end(Last Value), average value during the event time (Average Value).
After the example event setup, the followed report would be seen in the Reports menu:
Since the "Show on timeline" option was set when creating the event, it will also be shown on the timeline. The line with a point on the axis mark event start time or the one-moment event. You can navigate the timeline holding main mouse button to move horizontaly and zooming with mouse wheel button.
