System settings and maintenance
Содержание
System settings
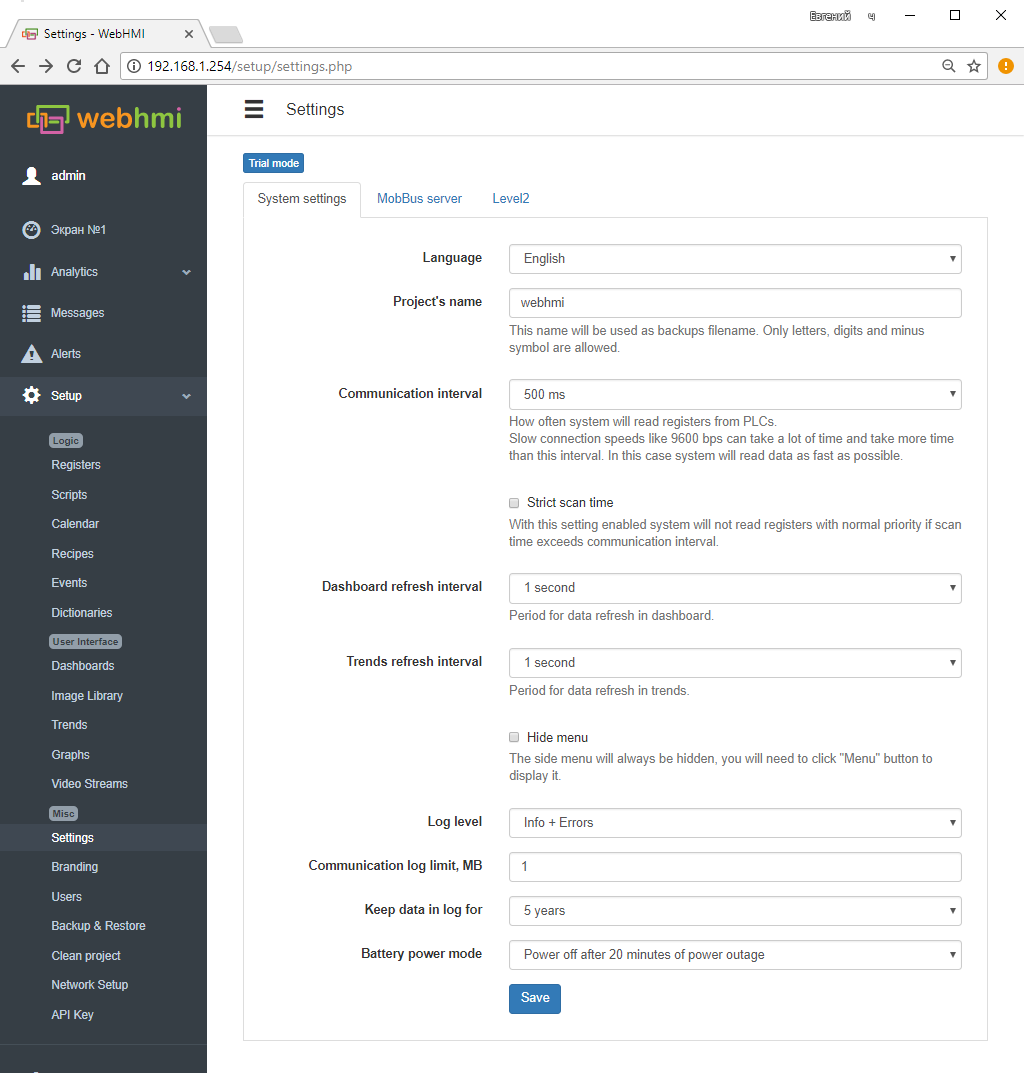
System settings specify the performance parameters, the depth of data storage in logs and their idealization, as well as additional functions - ModBus / TCP server, WebHMI Cloud.
- Interface language - 4 options: UKR., RUS., ENG. and auto select.
- Communication interval - Specifies the period of data exchange with the connected devices (time of scanning devices or 'scan'). After this time, WEBHMI starts a cycle of continuous exchange with devices at their respective speeds with minimal delays between consecutive polls. A short interval increases the polling frequency, reduces the response when changing the register on the dashboard, and the 'response' of changes in the trends, but with a large number of interrogated data, they may not fit in the interval at the time, which will actually increase the scan, increase load on the system. This settings should be set reasonably.
If you need to 'have time' to query a large amount of data for a second, first you need to increase the speed of communication with devices, use the priority of reading the registers in conjunction with the option 'strict scan', do not read the auxiliary registers unnecessarily (use the Read On Demand option for this).
- The option Strict scan - this option allows to get a time-determined scan. If all registers fail to "fit in scan", high-priority registers should be given high priority in the register properties, and registers with normal priority should set individually longer polling time than the default interval. Then, after reading the high-priority registers, the remainder and the number of registers with normal priority will be subtracted in the remaining sequence before the scan ends.
- Dashboard refresh interval is the frequency of data update on the dashboard. Adjustable in steps of 50 ms. up to 5 sec.
- Trends refresh interval- the frequency of trend data update, possible values:
- 50, 100, 200, 333, 500, 800 ms
- 1, 1.5, 2, 5 sec.
- Log level - level of the system log detail, possible values:
- Disable log - disabled;
- Errors - errors only;
- Info+Errors - errors and informing messages;
- Debug+Info+Errors - previous plus debug info;
- Trace+Debug+Info+Errors - previous with trace data;
- Communication log limit, MB - Max. size of the communication log, Mb;
- Keep data in log for - setting the depth of storage of the stored data (logs of registers, events, data of graphs)
Battery operation mode - 3 scenarios for operation with external power off: off. immediately, wait 20 minutes, or work until the battery is completely discharged
MobBus server - when turned on, allows external client to poll the project register using Modbus/TCP protocol. (see function description)
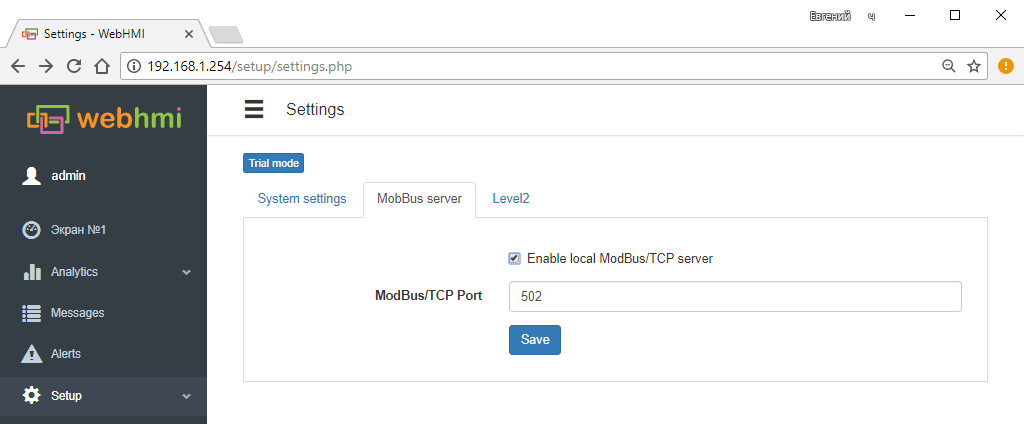
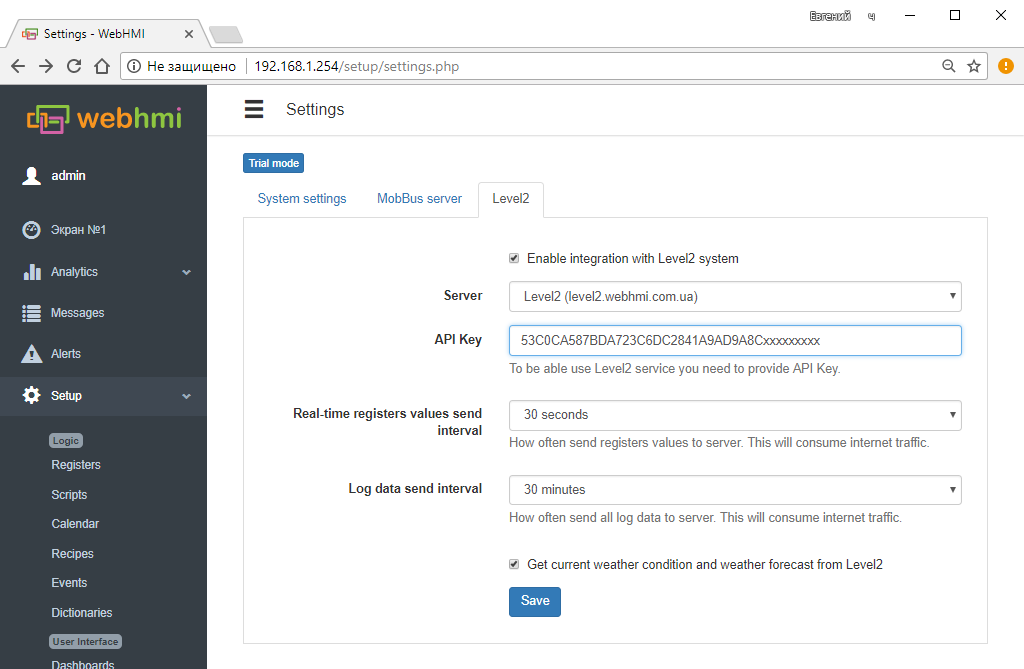
Level2 - turning this option on allows integrating with level2 server
- API key - this key will be used for sending WebHMI data to level2
- The interval of sending the register current values of (Real-time registers values send interval) and collected data (Log data send interval) is adjusted in steps of 1 sec. up to 1 day.
Managing users
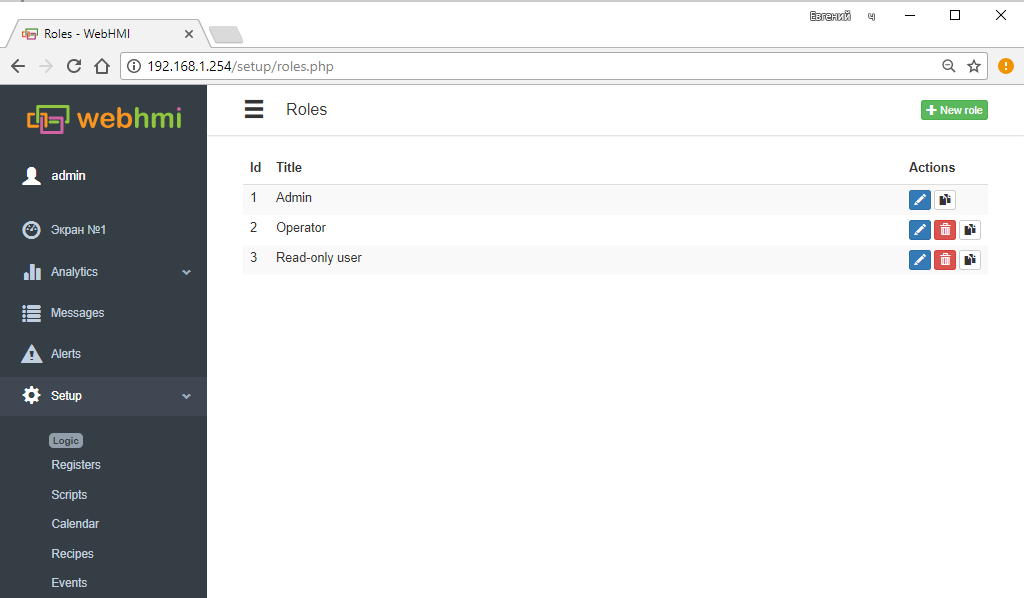
In WebHMI, there is a mechanism for managing users and their roles. On the new device, three roles are configured by default:
- Admin - can perform any actions in the project
- Operator - can use the ready project to change the values on the dashboard and access only to allowed pages of the project
- read-only user - can only view the project running
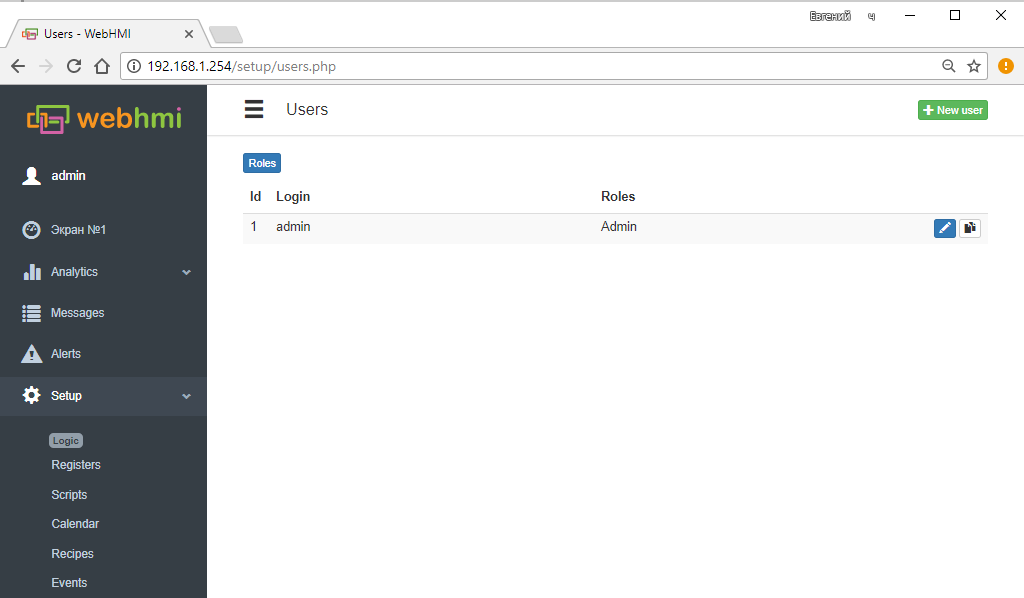
and one user with admin role:
However, there may be more roles and users. Users start from the Configuration / Users menu, there is also a button for switching to the role editing menu.
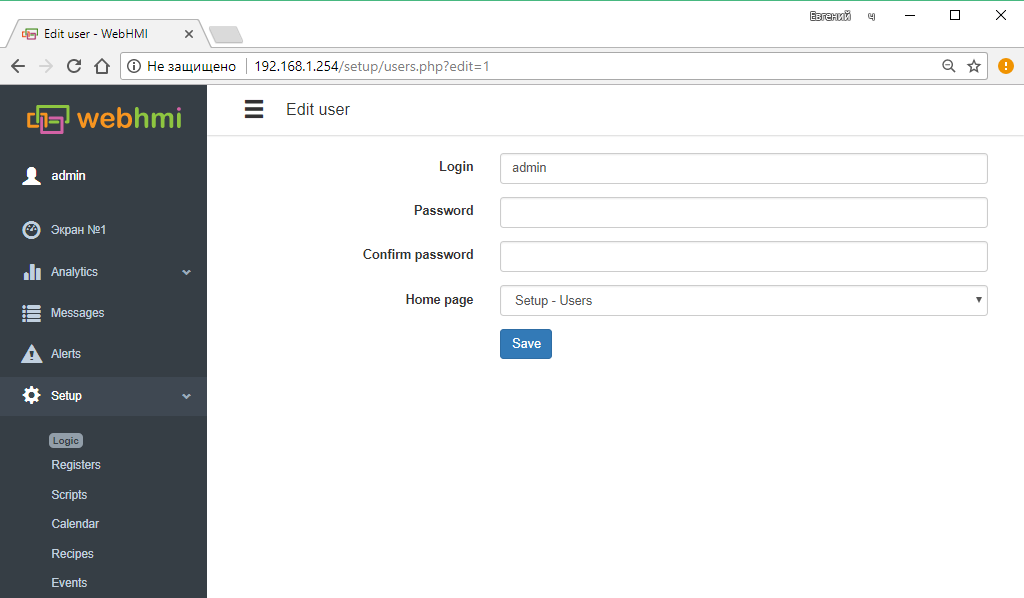
The user can specify a name, an entry password, a page after entering the interface:
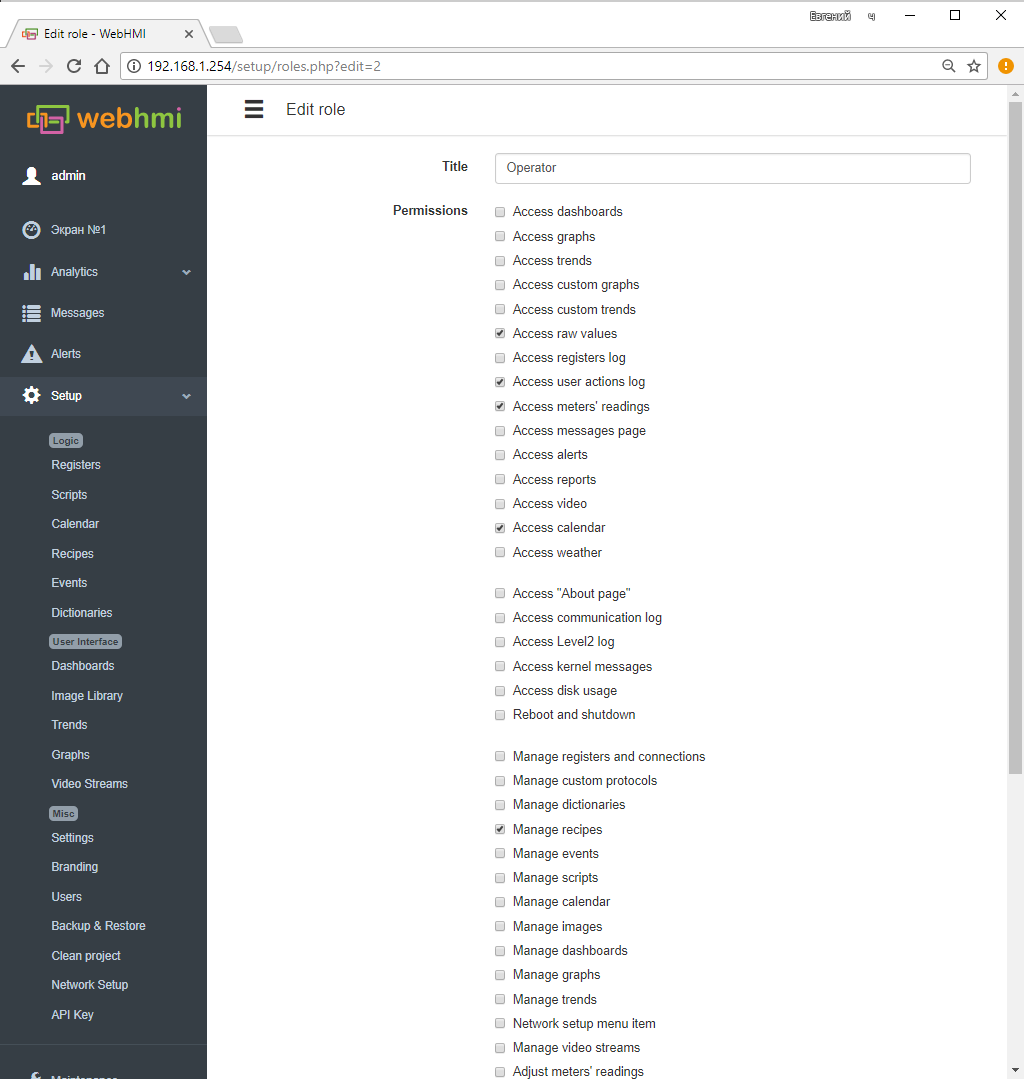
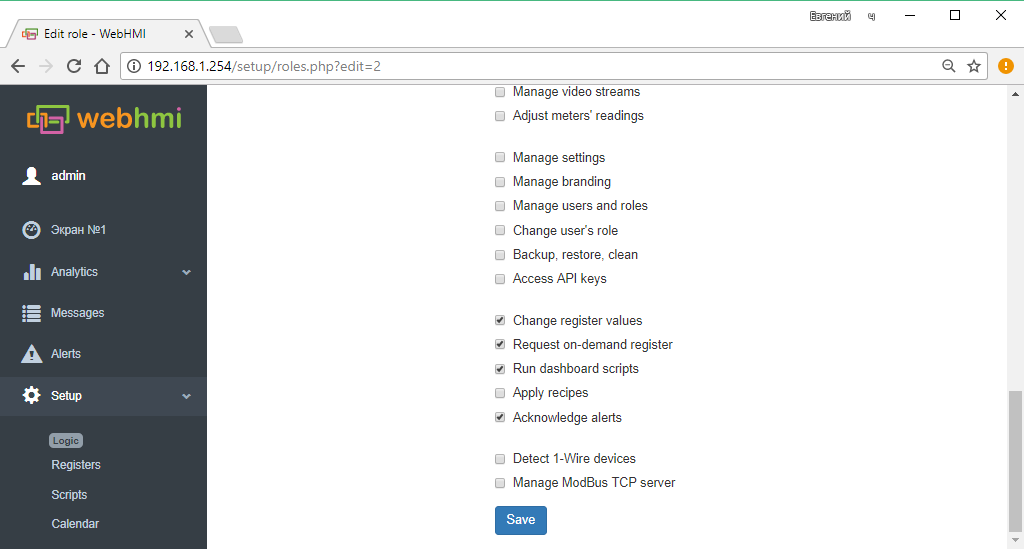
For each role, you can define valid actions for accessing parts of the project for viewing or editing. The following is an example of setting up a predefined role
"Operator"
продолжение:
Project backup and restore functions
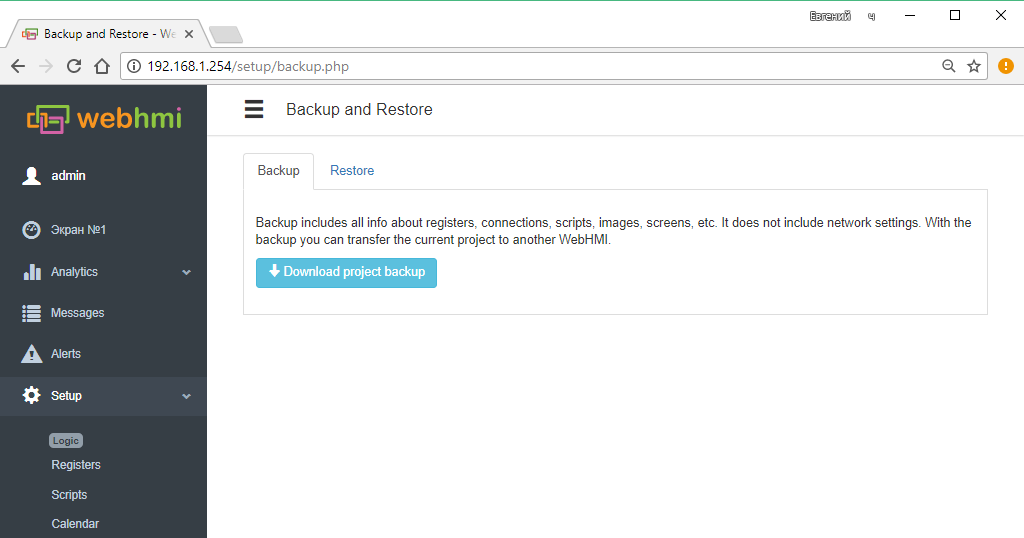
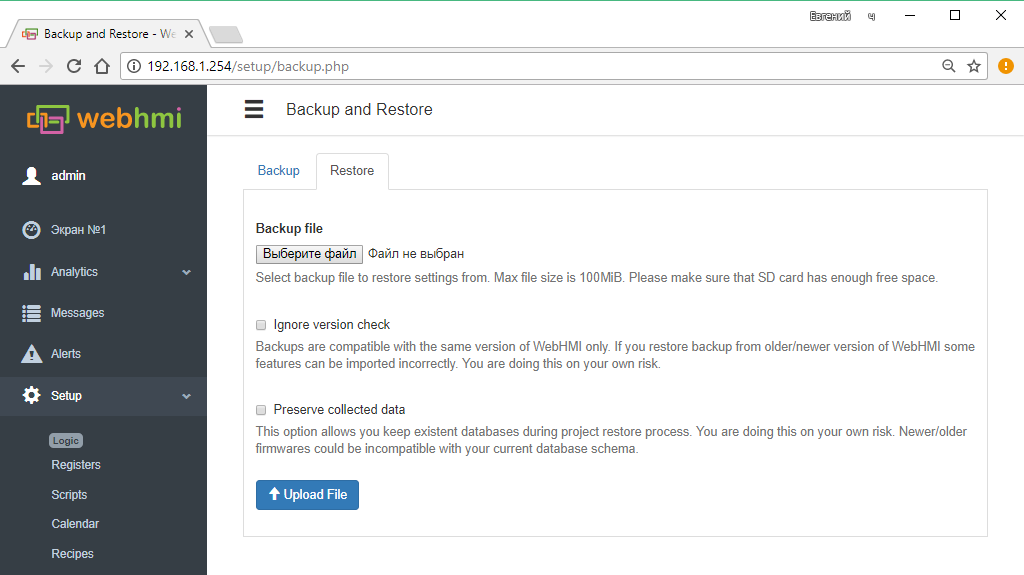
The menu item Save configuration (Setup / Backup & Restore) allows you to backup the project, restore it from the archive. To save the log, you can copy it from the SD card, or by logging into WEBHMI using the ftp protocol (with the same settings as for logging in network setup ) and copying \log folder. In order to restore the data, you must also copy this folder back to the SD card (provided that databases structure are identical, see below and consult with supplier).
The tab Restore - download a backup copy of the project. See the note for a description of the Backup function.
Maintenance
Logs
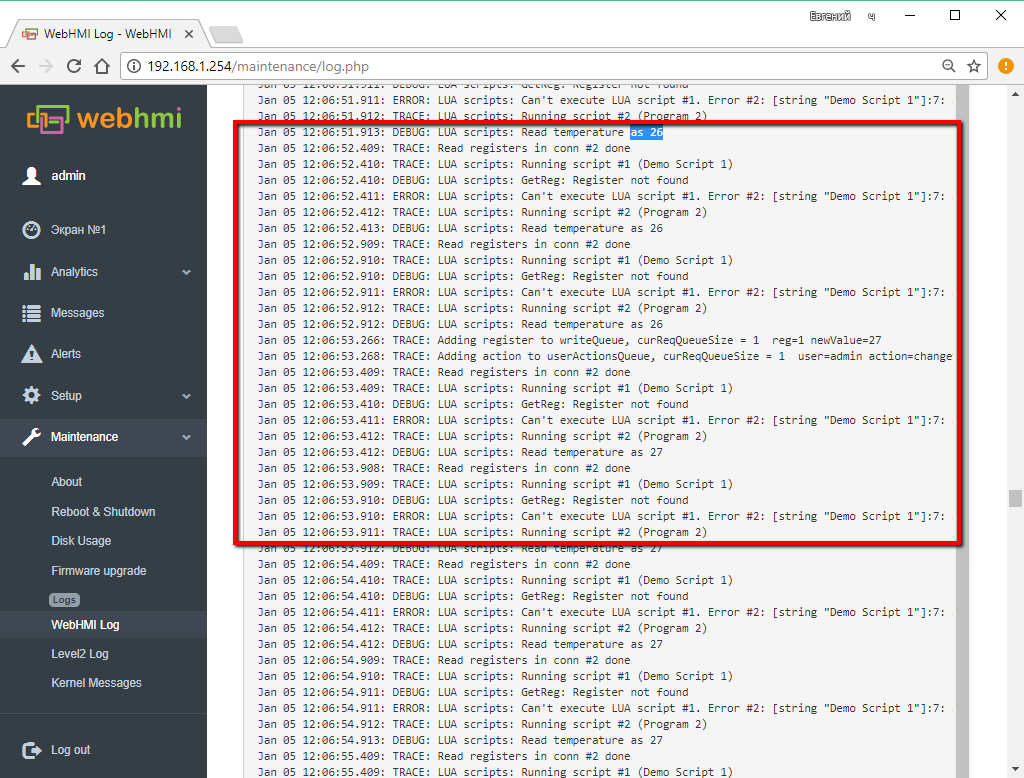
Menu Configuration / Logs serves for viewing current logs:
- Communication
- Level2 exchange log
- OS kernel log
In the communication log messages are categorized (see System Settings). Below is a fragment of the log with the maximum level of detail. For example, string
Feb 01 16:06:43.859: DEBUG: Scan done
indicates the completion of the polling cycle of external devices (debug level).
Strings
Feb 01 16:06:44.278: TRACE: ModBus: Sending message, 01 03 00 00 00 0A C5 CD
Feb 01 16:06:44.283: TRACE: UART: Sending data to port...
Feb 01 16:06:44.349: TRACE: ModBus: Received message, 01 03 14 00 00 00 01 00 02 00 03 00
report the transfer of data to the serial port and show the actual contents of telegrams sent and received (trace level).
Basically, these logs are intended for for system diagnostics and for the user are of interest only in the case of debugging programs or other kind of problems- in this case, these logs should be sent to the seller's technical support.
Firmware upgrade
WebHMI is constantly evolving and improving - new opportunities are emerging, the old ones can be modified, some become unnecessary and go away, and the identified errors are also corrected. However, you must bear in mind that an existing project created in a version other than the WebHMI version where it is planned to be installed may not be fully compatible. As a rule, versions with a small difference in numbers in the last positions of the firmware version are compatible 100%, but with a very large version difference, partial compatibility is possible. For example, this was the case when switching from 1.9 to 1.10. Then Lua scripts were added and old visual scripts were removed because they were much less functional. Thus, after downloading the project version to 1.9 to a higher version, it is possible (if the project used scripts) to write scripts in Lua.
Therefore, you should take this moment into account before updating. As already mentioned, the neighboring versions are usually 100% compatible, and although a warning is issued when trying to restore a project with an excellent version, you can disable this check by checking the 'Ignore check version' flag.
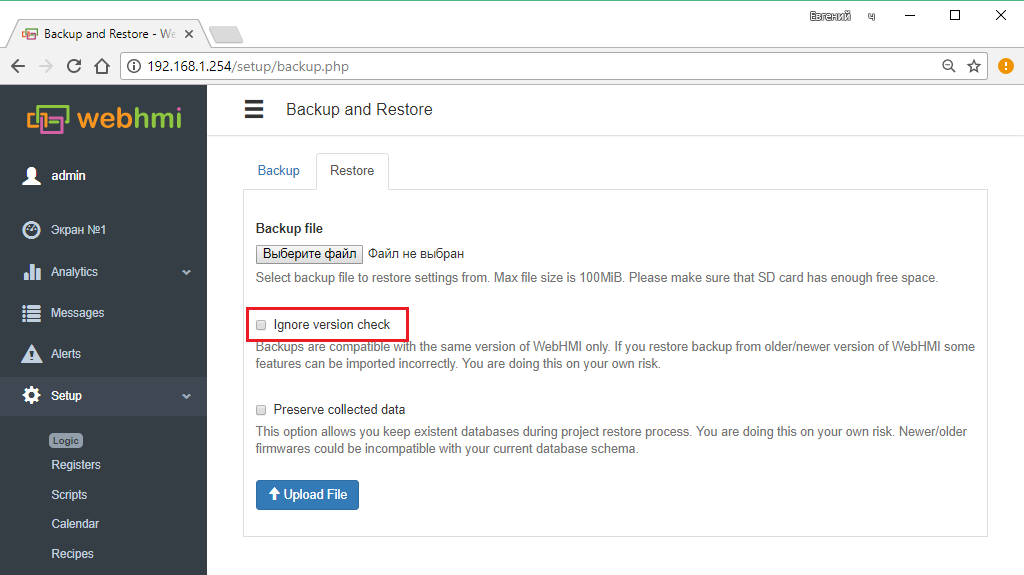
If you have a replicated solution based on WebHMI and your project works well for a specific firmware version, then so to not waste time in the future to adapt an existing project to a newer firmware, you can simply use the same version in which the project was created.
When updating the firmware, the current project is always erased. After the upgrade, the project needs to be restored from the previously saved backup.
If you have questions about the compatibility of the firmware before upgrading, consult the supplier.
To obtain the update key, you need to send an application to info@
webhmi.com.ua with information about the company, the current version of the project, the WebHMI serial number and the version number to which you want to update - (the latest or the specific version in order to preserve the compatibility of the project).
Operation procedure for updating the firmware version:
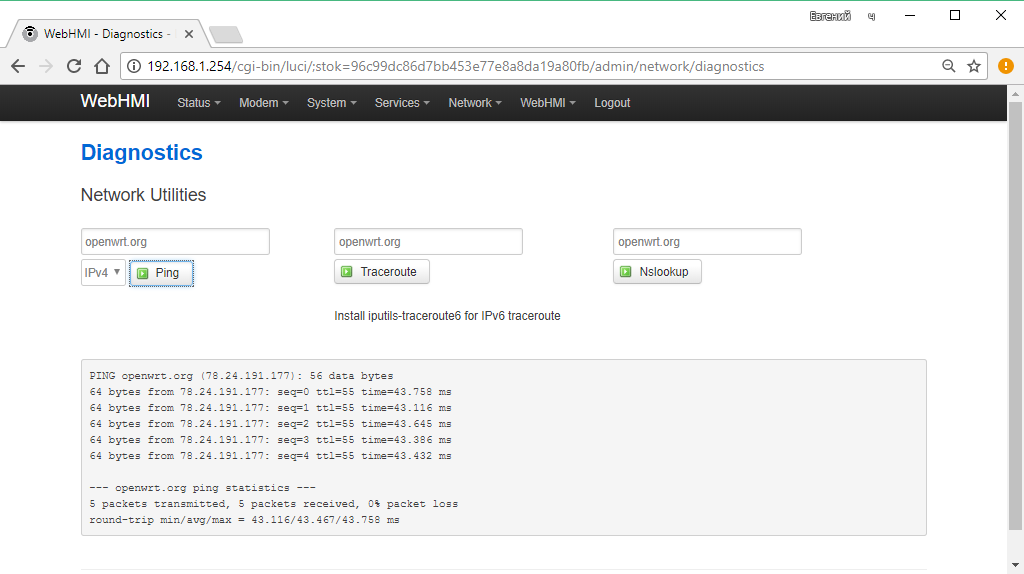
- You need to make sure that WebHMI is connected to the Internet and there is a connection to the update server by sending an echo request to webhmicloud.com. You can do this from the network settings by going to the 'Diagnostics' menu item. The normal result of the command is shown below. To configure an Internet connection on WebHMI, see
[здесь].
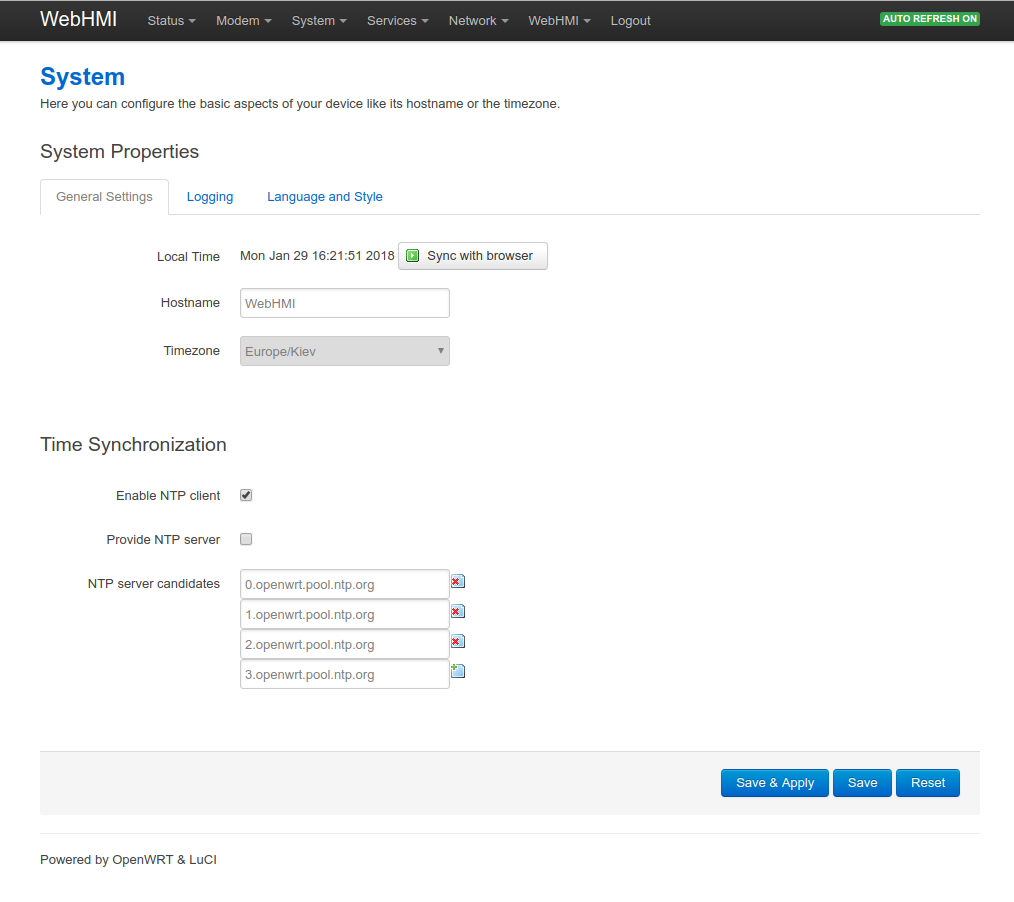
- You need to make sure that WebHMI has the correct date and time. If necessary, you need to synchronize them with your computer manually.
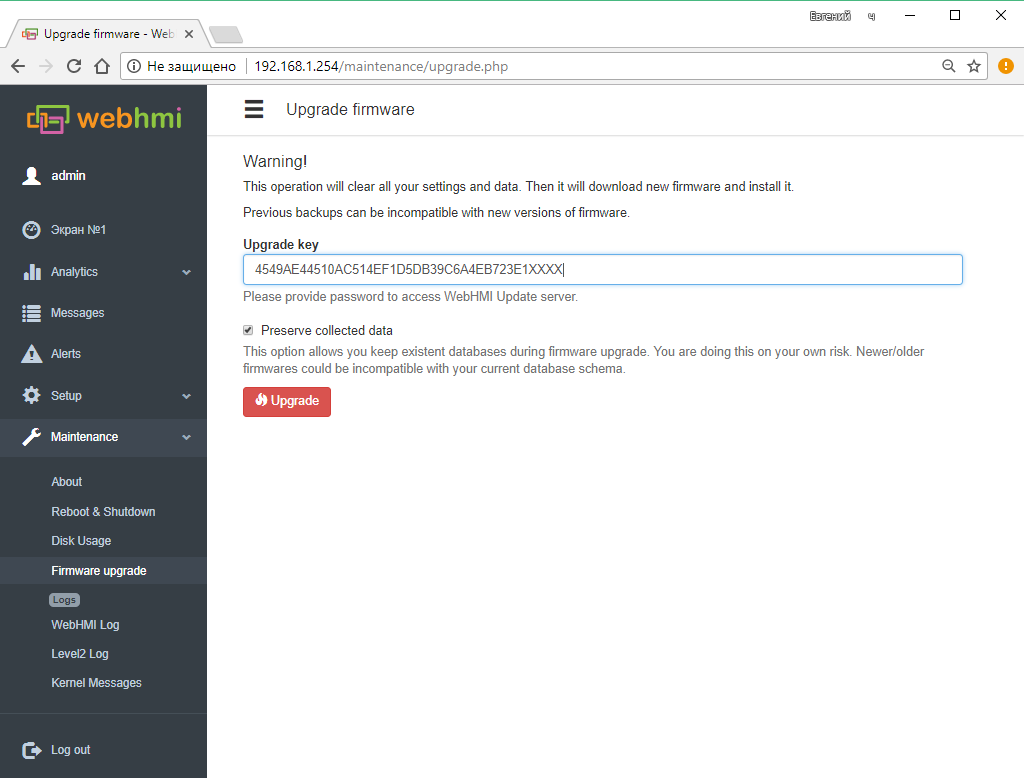
- In the Setup menu in the Backup & Restore menu, the Upgade Firmware tab, you must enter the update key received from the vendor (manufacturer) and click the Upgrade button
Immediately after the update, you must clear the browser cache to prevent problems with caching old files. Allows you to update the software version. To do this, it is necessary to obtain the upgrade key from the supplier. ATTENTION! All project data will be lost.
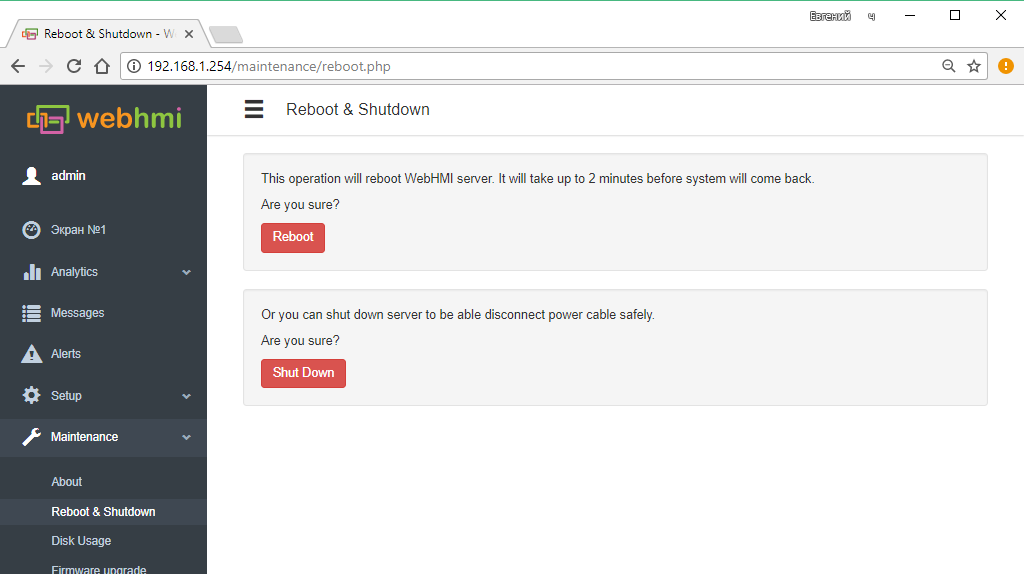
Reboot
Allows you to reboot WebHMI or make software shutdown.
About
Page with device information (firmware version).

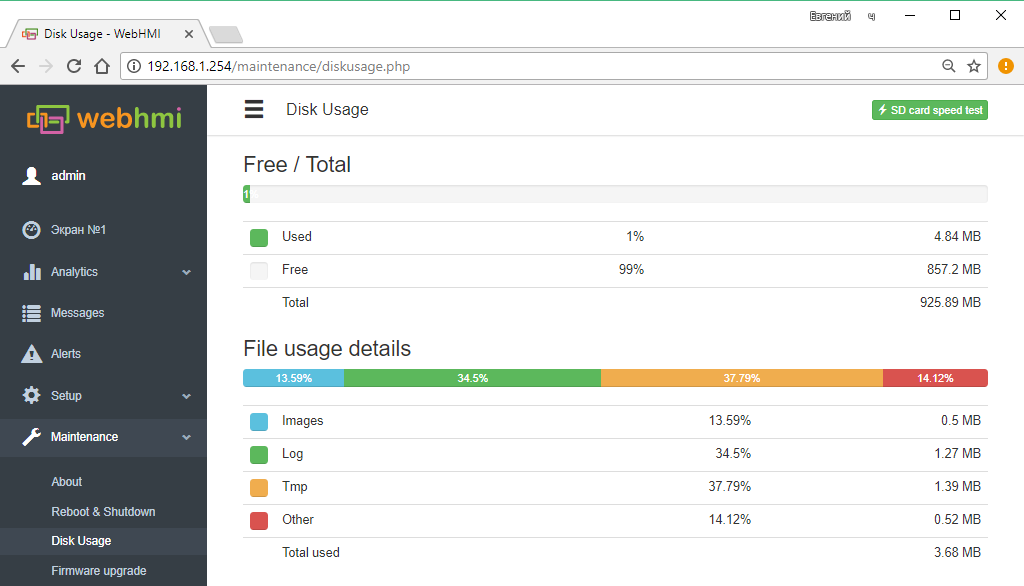
SD card usage
Contains summary information about the available space in the key folders of the memory card. Also here you can do performance test for your SD card.
